Install AgentX
The following steps are intended for a user with Admin Access only.
Note: If you are making any AgentX source code modifications and/or testing an installation in a development environment you may also want to see offline documentation about Publishing a new version of AgentX.
Step 1 Login
Login to the AWS console.
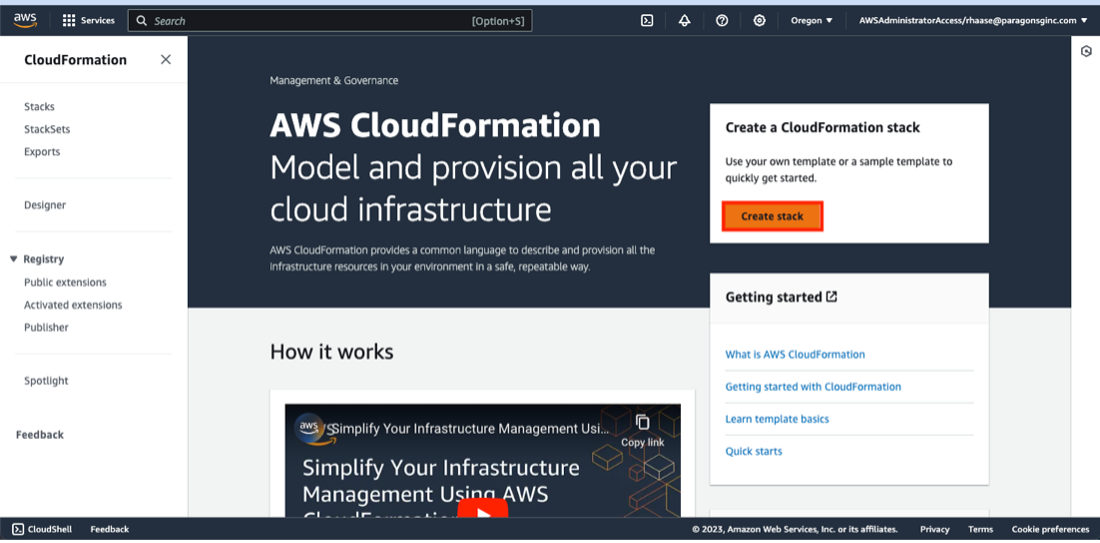
Step 2 Create Stack
Browse to the CloudFormation console and click on the ‘Create Stack’ button.
 Please be aware that “Amazon Connect” is only available in the US in US-East-1 (aka Ohio) and US-West-2 (aka Oregon). Please ensure you set up access to one of these regions. (Paragon can assist with this set-up or consult with your IT Administrator if needed).
Step 3 Specify Template
Under the ‘Specify Template’ section use ‘Amazon S3 URL’ as the ‘Template Source’ and enter the URL for the main AgentX Cloud Formation template: https://<BUCKET_NAME>.amazonaws.com/agentx/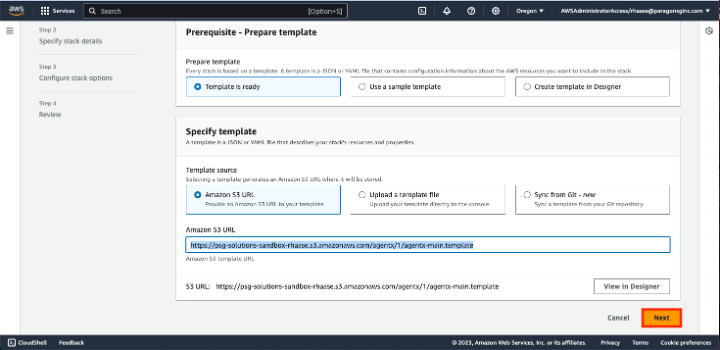
Step 4 Complete Stack Details
Complete the ‘Stack details’ page and click next.
a. Set the ‘Stack Name’.
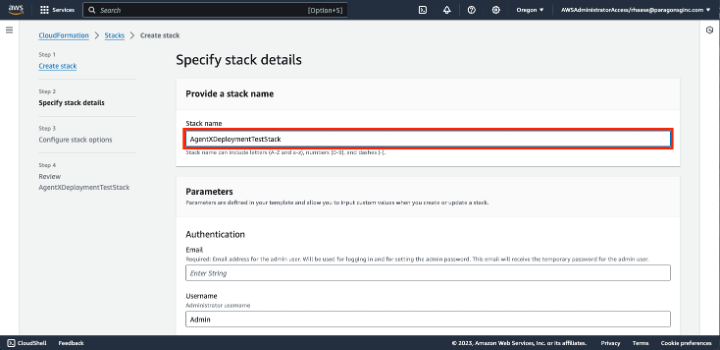
b. Under the ‘Authentication’ section set the email address for the admin user.

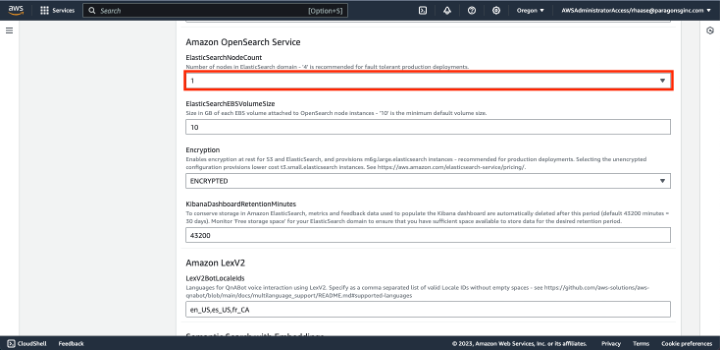
c. Under the ‘Amazon OpenSearch Service’ set the ‘ElasticSearchNodeCount’ to 1 to reduce cost in test environments.
d. Change any additional settings appropriate to your installation.
Step 5 Configure Stack Options
On the ‘Configure stack options’ page you can scroll down and click next unless you want to change any of the properties on this page.
Note: By default, AgentX is configured to retain metrics data in the live dashboard for 30 days. To extend the amount of time that metrics data is retained you canset the KibanaDashboardRetentionMinutes property. If you choose to increase the metrics data retention period to more than 30 days you will want to also increase the amount of storage assigned to your OpenSearch cluster using the property ElasticSearchEBSVolumeSize. For additional information please contact support.
Step 6 Review Options
Review the options on the final page. When you are satisfied check the required acknowledgements and click submit.

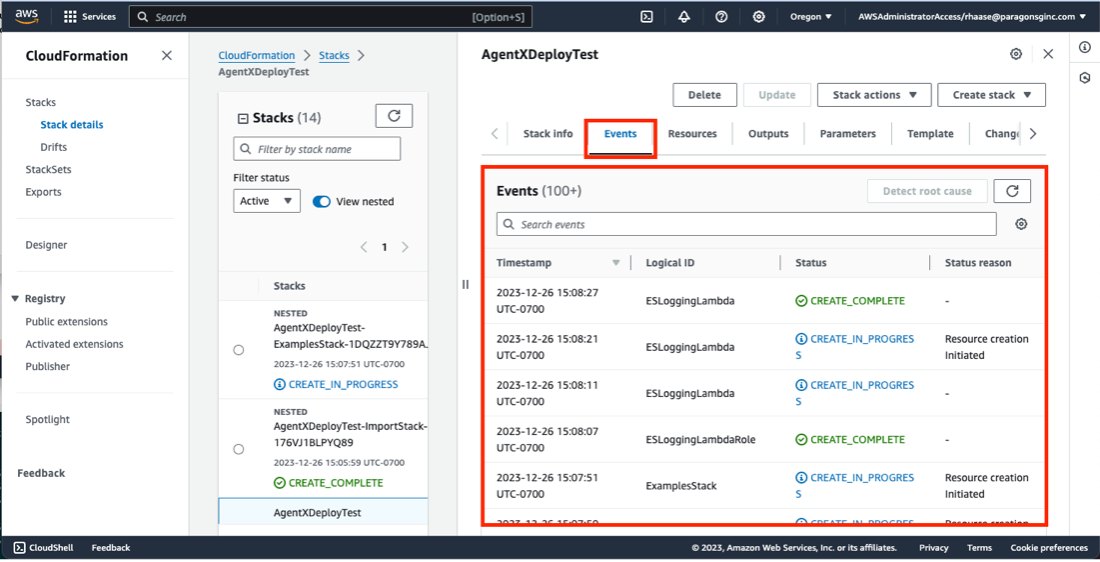
Step 7 Watch Progress
Once your CloudFormation job has been submitted you can watch the progress of the deployment by following the events logged in the events tab.
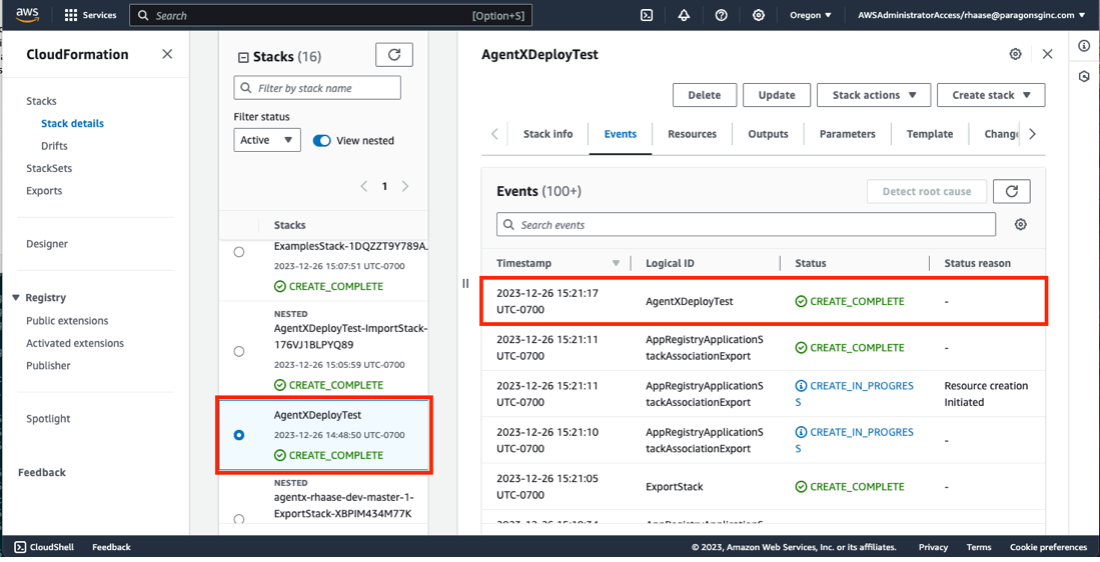
Step 8 Creation Completed
Wait for the CloudFormation stack to finish deploying. You will be able to tell because the stack will be marked ‘CREATE_COMPLETE’. NOTE: When the CloudFormation stack is finished deploying you will find useful information about the installation in the ‘Outputs’ tab.
Step 9 Confirm Completion
Check the email set in the CloudFormation stack for an email with the subject ‘AgentX Signup Verification Code’. You will need the information in that email to proceed to configuring AgentX.
Step 10 Congratulations!
Proceed to the Post-Installation Configuration.