Post Installation Steps for AgentX
Note: After you have completed an install, you will need to complete all of these configuration steps. If you’ve just done an upgrade, you may need to complete some of these steps. In either case, these post installation configuration steps are done in two places: the AWS Console below and the AgentX Content Designer
Post Installation Steps for AgentX in AWS Console
SIPMediaApplication
For AgentX to respond to phone calls we must configure a phone number, and the rules to route phone calls to the configured phone number to the AgentX service. This process requires administrator access to the AWS account where AgentX is installed.
Login
Login to your AWS account where the AgentX service is installed.
Chime SDK
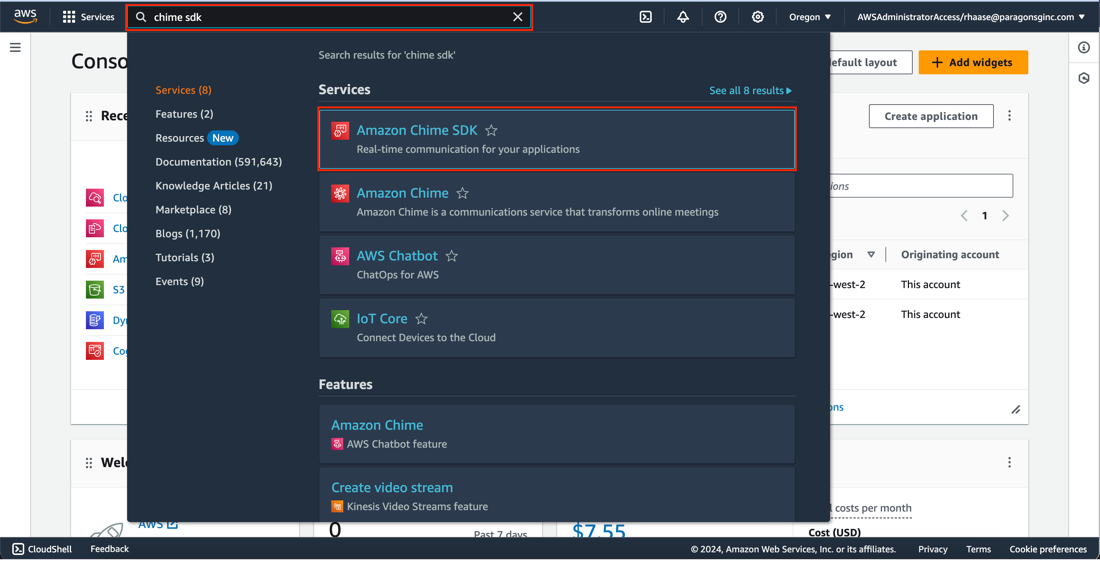
In the search box at the top of the AWS console home is a search bar. Search for “chime sdk” and select the Chime SDK service from the search results list.
Chime SDK Console
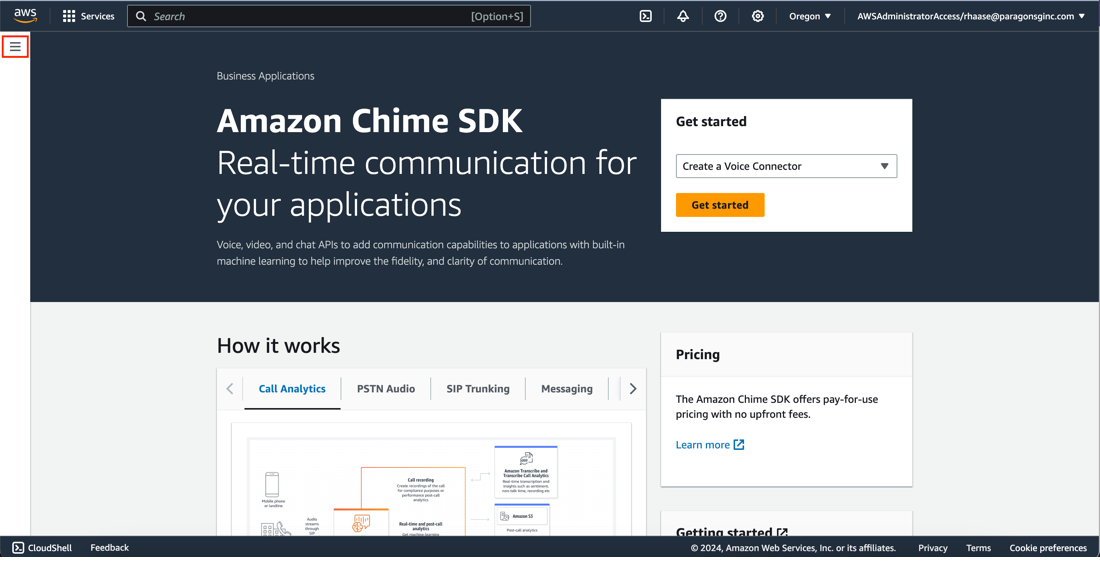
The Chime SDK console always opens on an informational page. To get to the section we need to configure we must first click on the hamburger menu in the upper left-hand corner of the screen.
Telephony Services
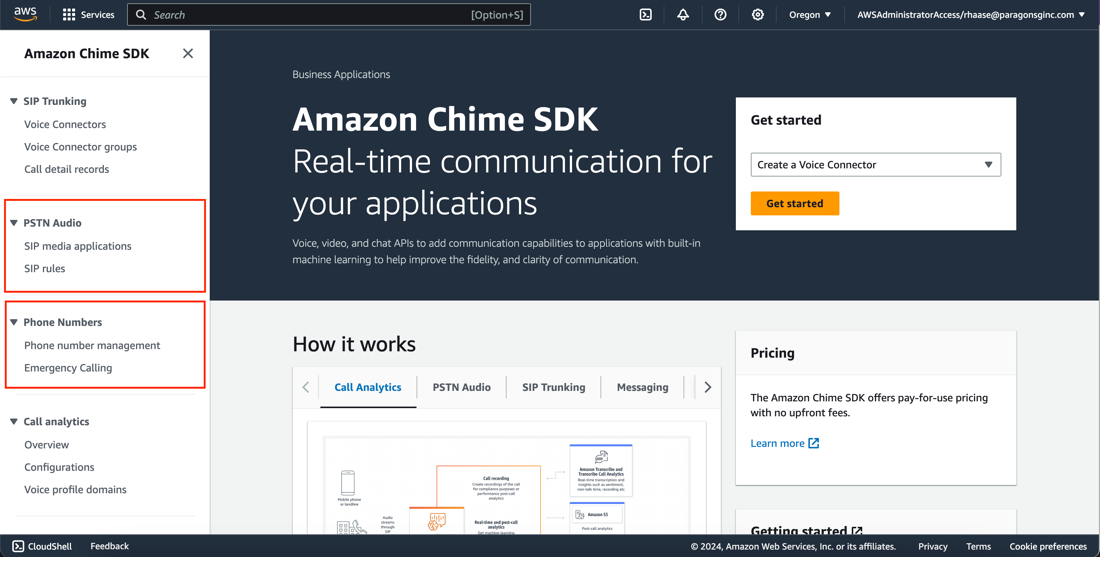
Once you have expanded the hamburger menu you will see a menu of telephony related services. There are two sections we will need to configure the AgentX phone number: Phone Numbers and PTSN Audio.
Provisioning a phone number in Chime SDK
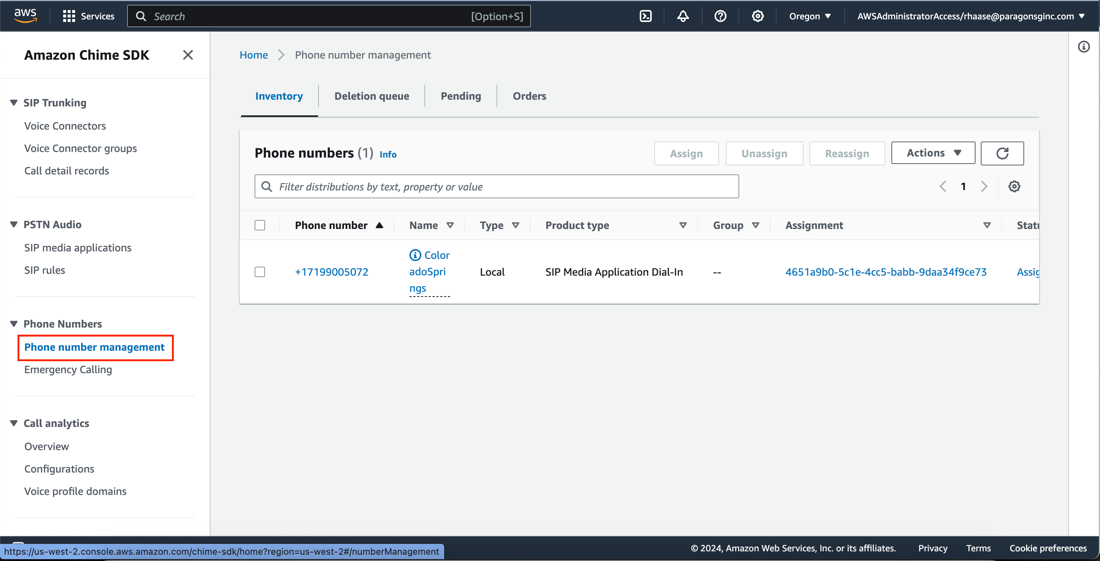
First, we need to create the phone number where AgentX will respond to calls. Click on Phone Number Management. Note: In the screenshot below, a phone number has already been configured. This is because this documentation includes screenshots from my development sandbox and has another instance of AgentX configured. Your console is likely to have nothing on this screen the first time you open it.
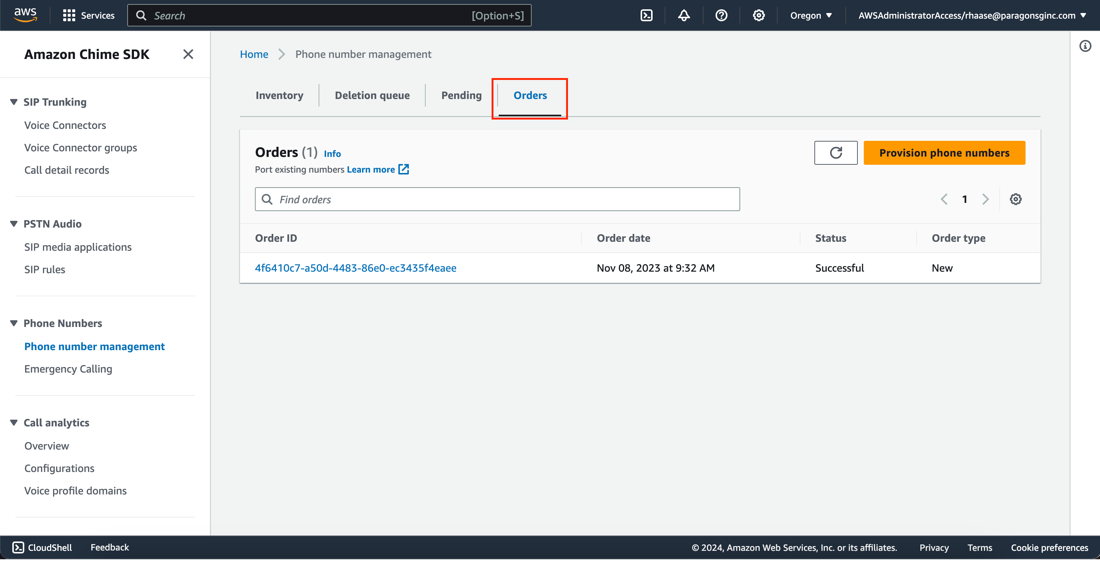
Orders
Next click on the Orders tab. This will take us to the screen where we can provision a new phone number. Note: This screen will also probably be blank when you first browse here. My screenshot just shows a previously configured number. Don’t worry if your screen has nothing provisioned!
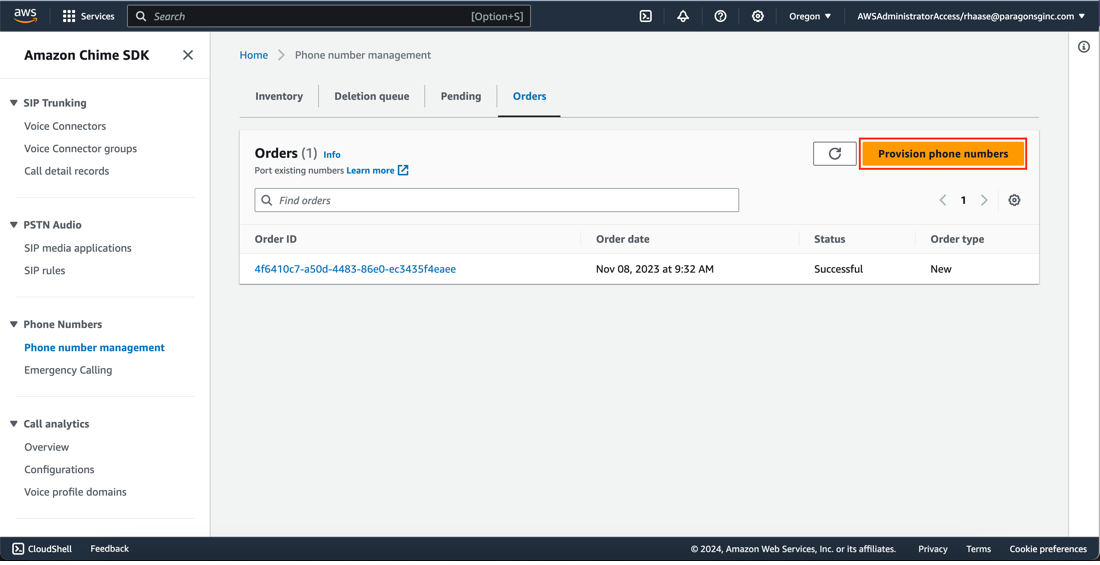
Provision a number
Now click on the Provision phone numbers button.
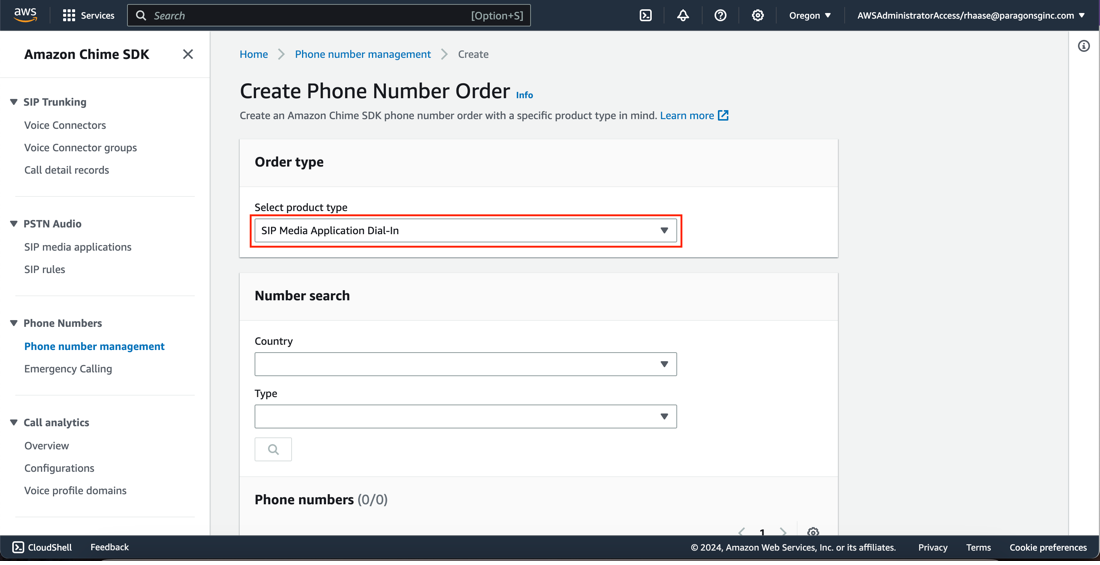
Select a number
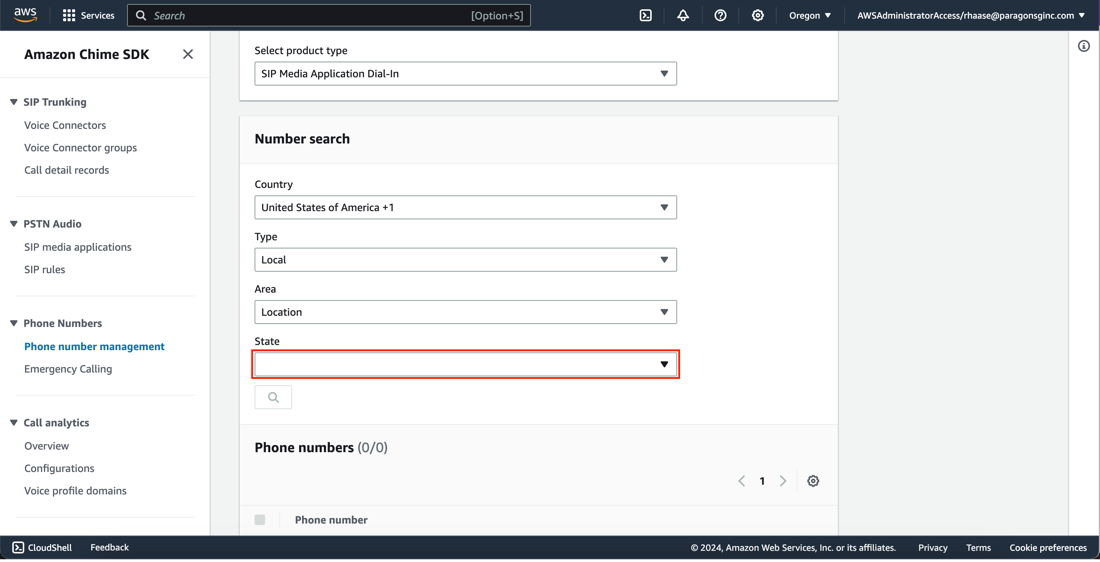
The next screen lets you select a phone number. First, choose SIP Media Application Dial-in from the product type drop down menu. This will expand the screen input so you can find a phone number.
Country code
Now add a country and type for the phone number. Unless you specifically need a toll-free number choose local from this drop-down menu. Additionally, fields will appear after these two fields are filled in.
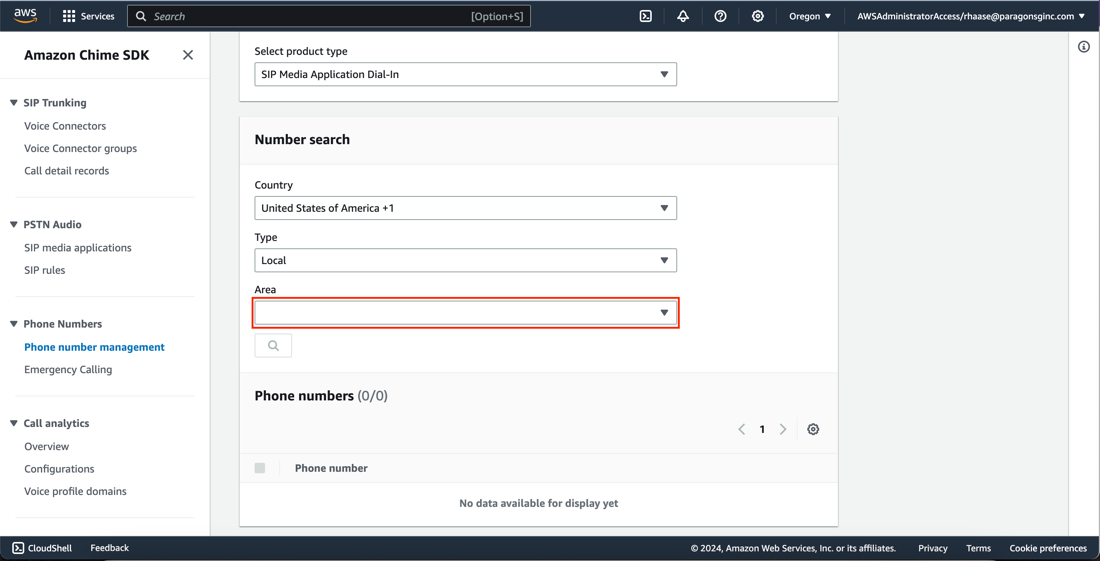
Find a number
In the area box you are given the option to find a phone number by area code, or by location. Either is a fine choice, and in this example, I will use the location to find a phone number.
State
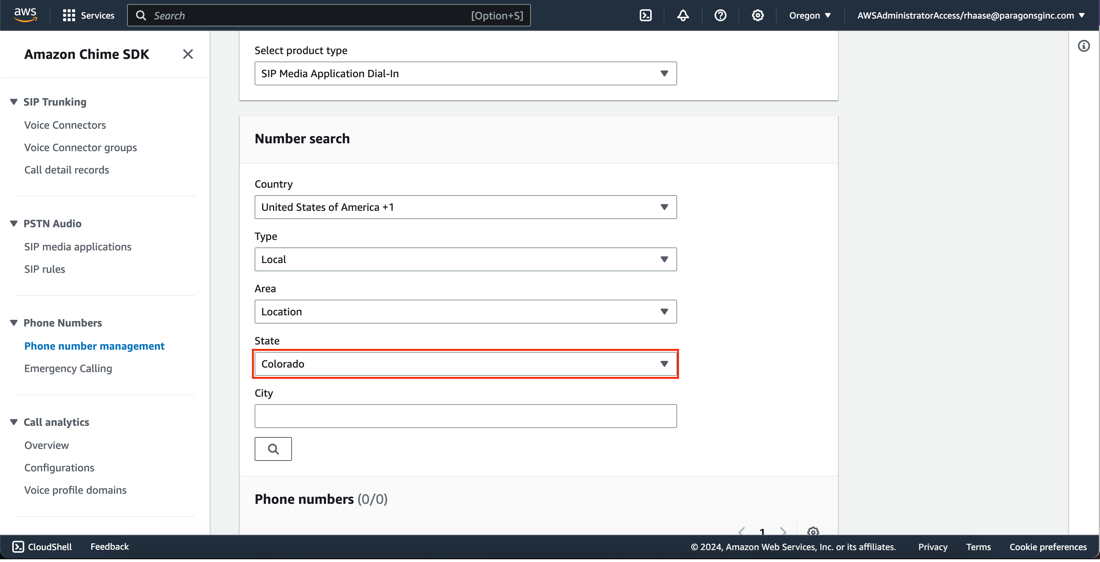
Next, we are asked to pick the state of the phone number.
City
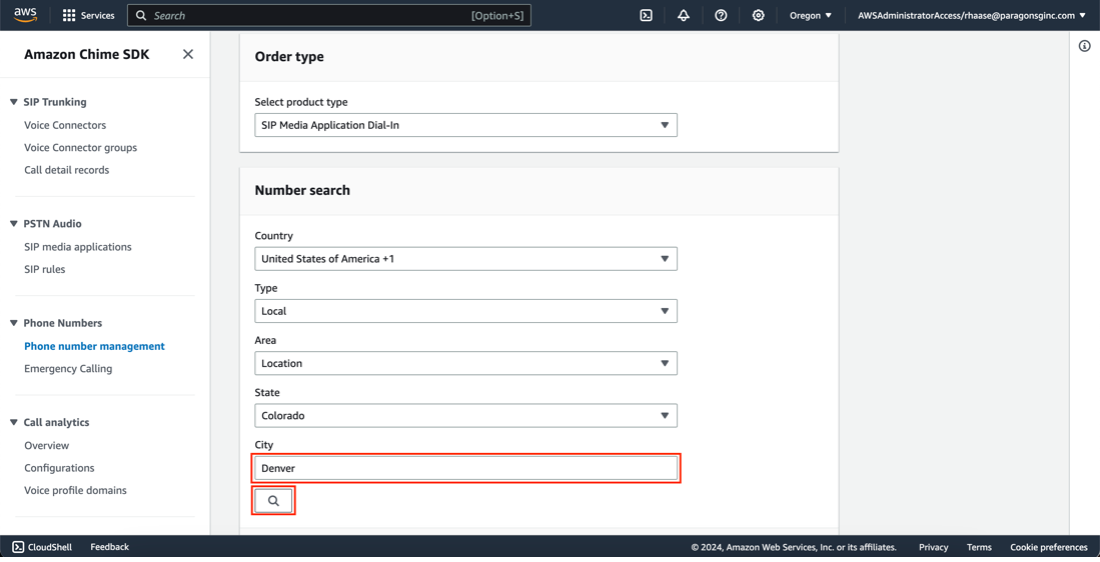
Last, we enter the name of the city we want and click the search icon to see a list of phone numbers we can provision.
Available Numbers
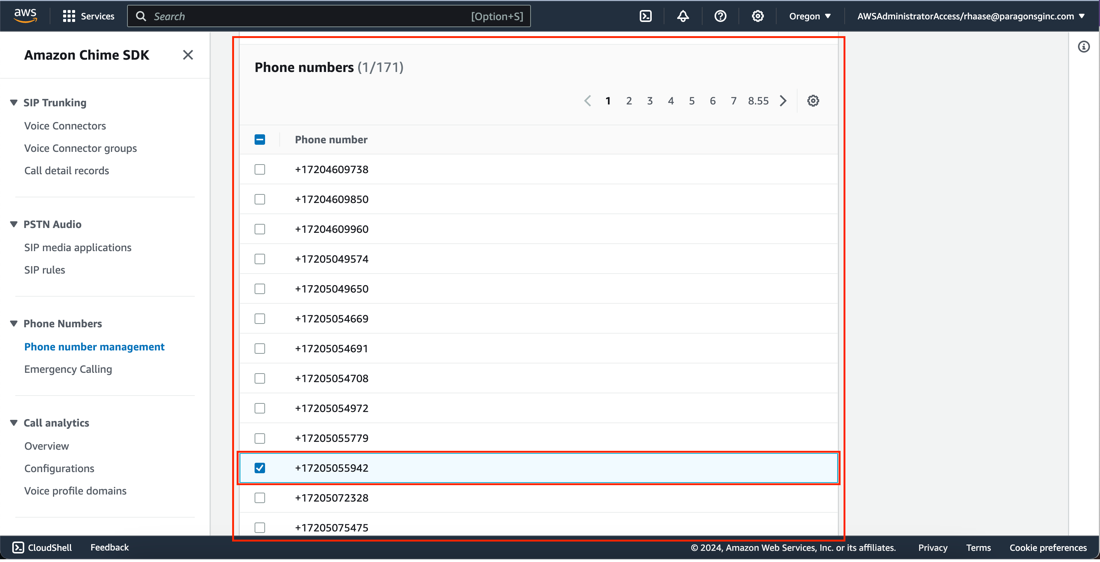
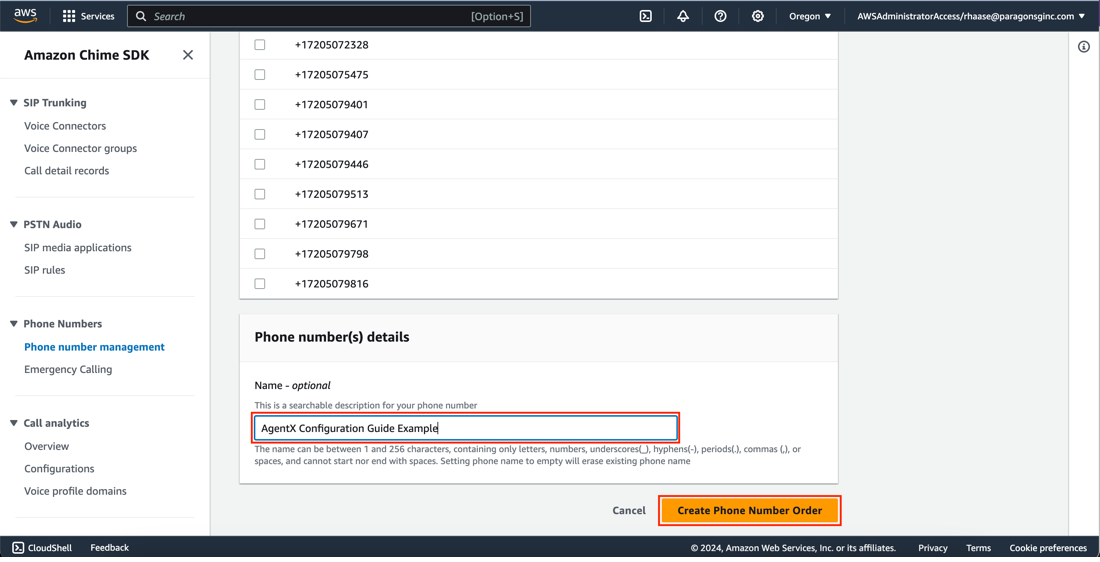
Below the Number search box a list of available phone numbers for the location you specified will be displayed. Check the box next to the phone number you would like to provision and scroll down to enter an optional description.
Add Description
At the bottom of the page you will find a box for an optional description of the phone number. Enter a description if you want to add one, and then click on the Create Phone Number Order when you are ready.
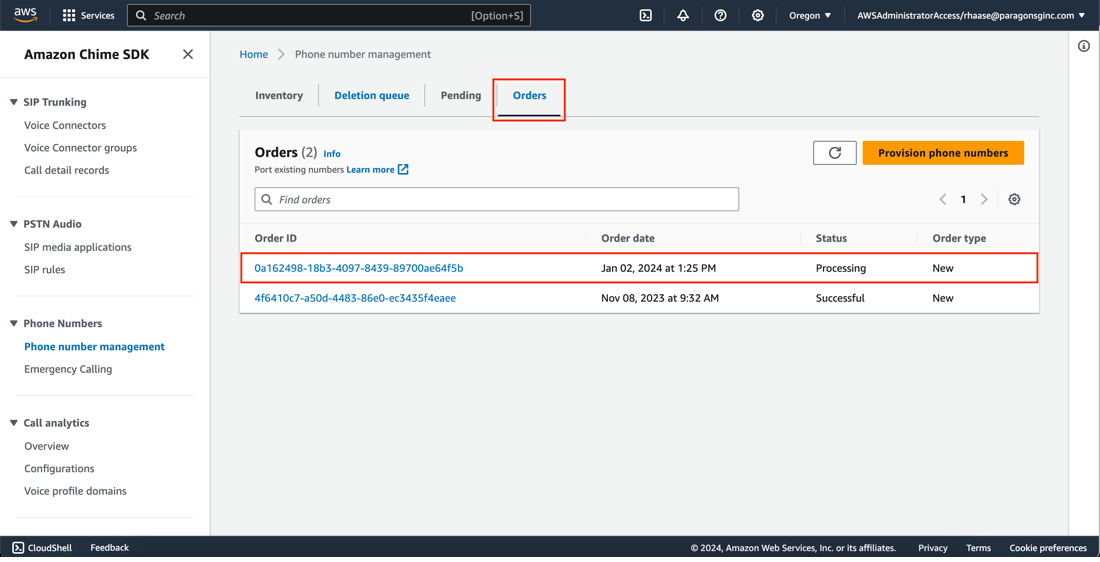
Complete Order
Clicking Create Phone Number Order returns us to the Phone number management page. The phone number provisioning can take a couple of minutes to be provisioned. To see the status of the number we just requested we can look at the Orders on the SIP Media Application page. The one we just created is currently in the Processing state.
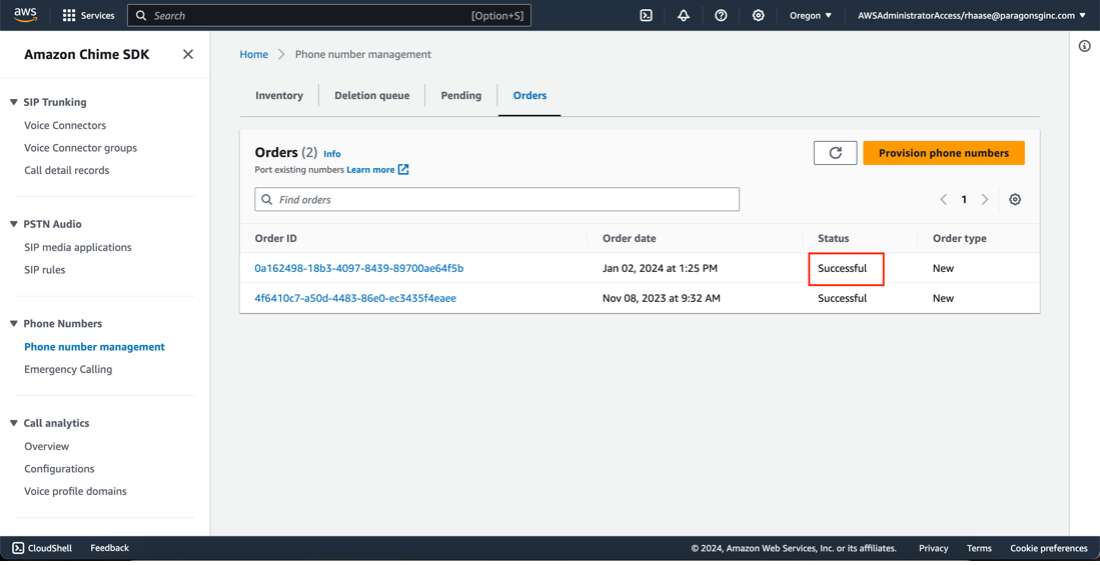
Order Status
When the number is ready to be used the state of the order under the Orders tab will change to Successful.
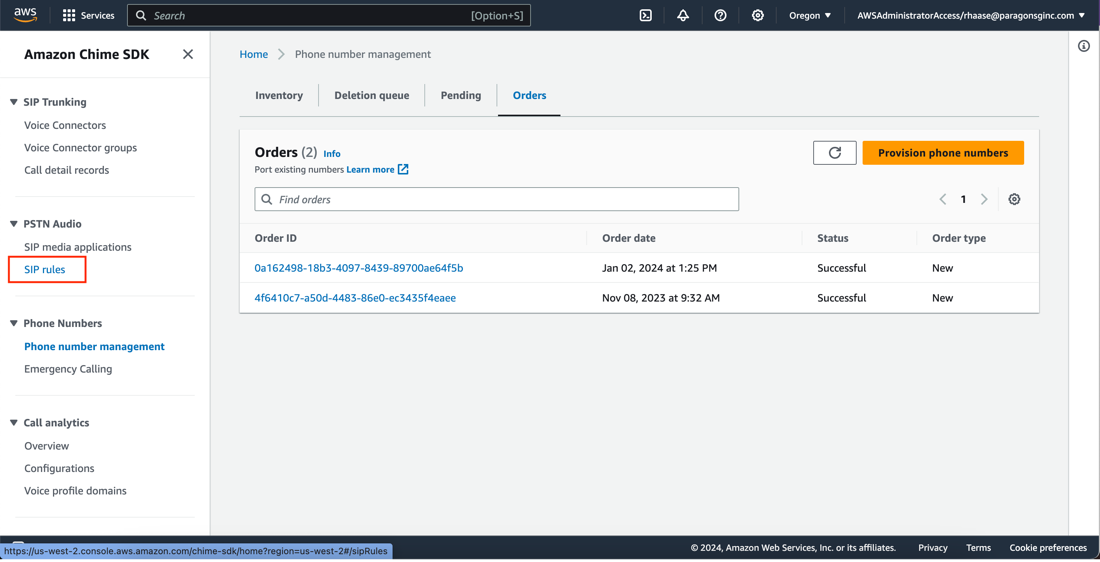
Configure the SIP Rules for routing calls to Agent X
SIP Rules
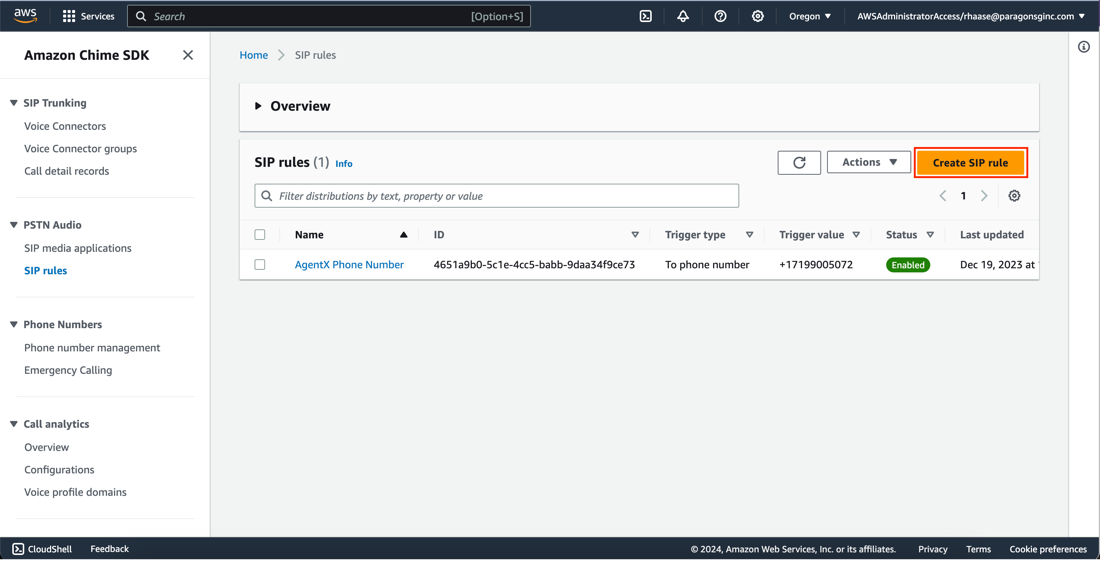
Now that we have a phone number provisioned we can continue our setup by clicking on SIP rules in the menu.
Create Rules On the SIP rules page click Create SIP Rule.
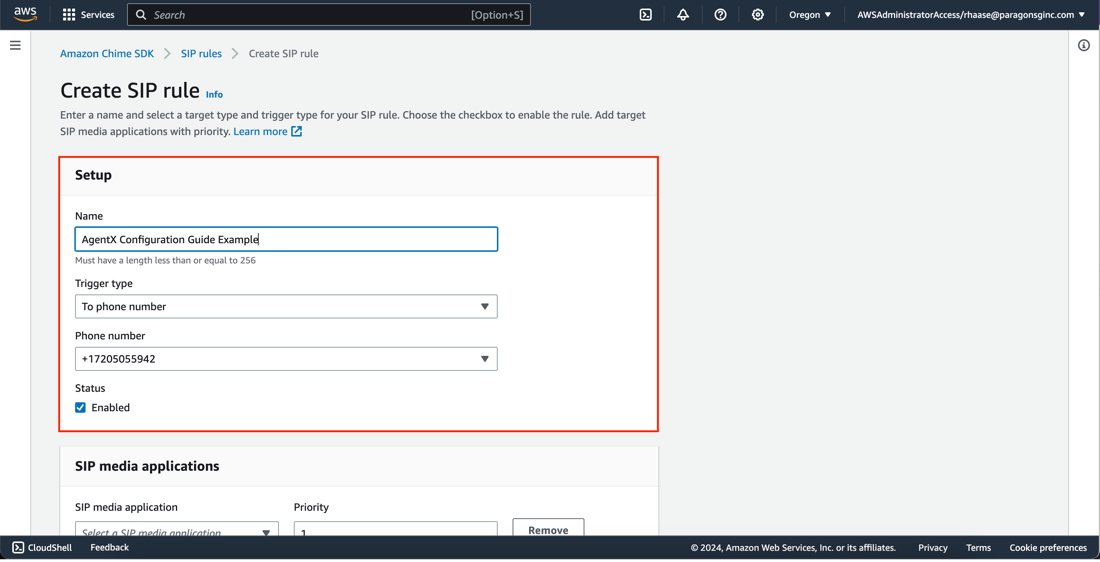
Rule Description
In the Setup box add a description for the rule, next select ‘To phone number’ from the Trigger type drop down menu and choose the phone number we just provisioned from the Phone number drop down menu.
20 Rule Details
Scroll down to the SIP media applications box and select the name of the SIP media application where this rule should be applied. The name of the rule will be prepended with the CloudFormation stack name you defined while installing AgentX, and appended with a string of random characters for uniqueness, e.g. the CloudFormation stack name used for this example is CFDeploy-AgentX-5, so the SIP media application in this example is called CFDeploy-AgentX-5_SIPMediaApplication_QYY5PUDX. Once you have selected the SIP media application, click Create SIP Rule. Note: It is not necessary to change the Priority field.
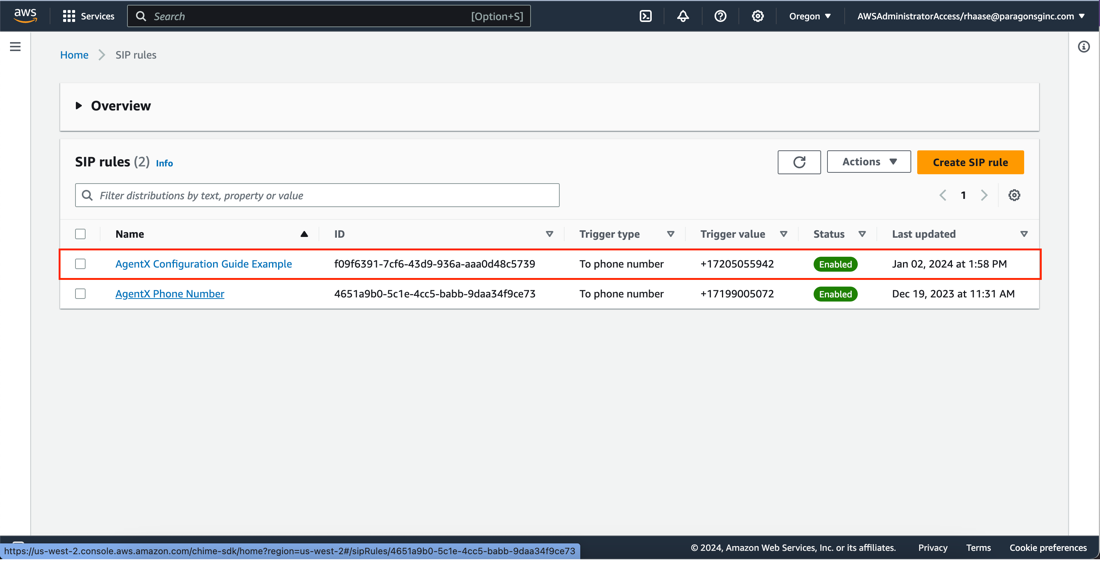
Review Rules
Creating the new SIP rule will return us to the SIP rules page where we can see the new rule we just created.
Give it a go!
Now we can call the newly configured number and speak to AgentX! Please be aware that sometimes it can take up to an hour for the SIP rule to take effect, so don’t worry if you try the number immediately after completing this guide if it doesn’t work. Give it a little while and try again.
Pinpoint service setup for SendMeThat Skill Pack Configuration [WIP]
The SendMeThat Skill Pack allows AgentX to send the last answer it gave a caller as a text message. This allows the caller to reference the response at any time.
Import the SendMeThat Skill Pack. See Importing Skill Packs.
In the search box at the top of the AWS console home is a search bar. Search for “pinpoint” and select the Chime SDK service from the search results list.
Post Installation Steps for AgentX in Content Designer
Note: After you have completed an install, you will need to complete all of these configuration steps. If you’ve just done an upgrade, you may need to complete some of these steps. In either case, these post installation configuration steps are done in two places: the AWS Console and the AgentX Content Designer here.
Import Skill Packs
AgentX Skill Packs contain questions that extend system features and provide examples for customers to use as a starting point when building out their AgentX installation. These are the steps to import a Skill Pack. Be sure to consult the documentation for any configuration instructions after adding a new Skill Pack, as some require additional configuration to work as expected.
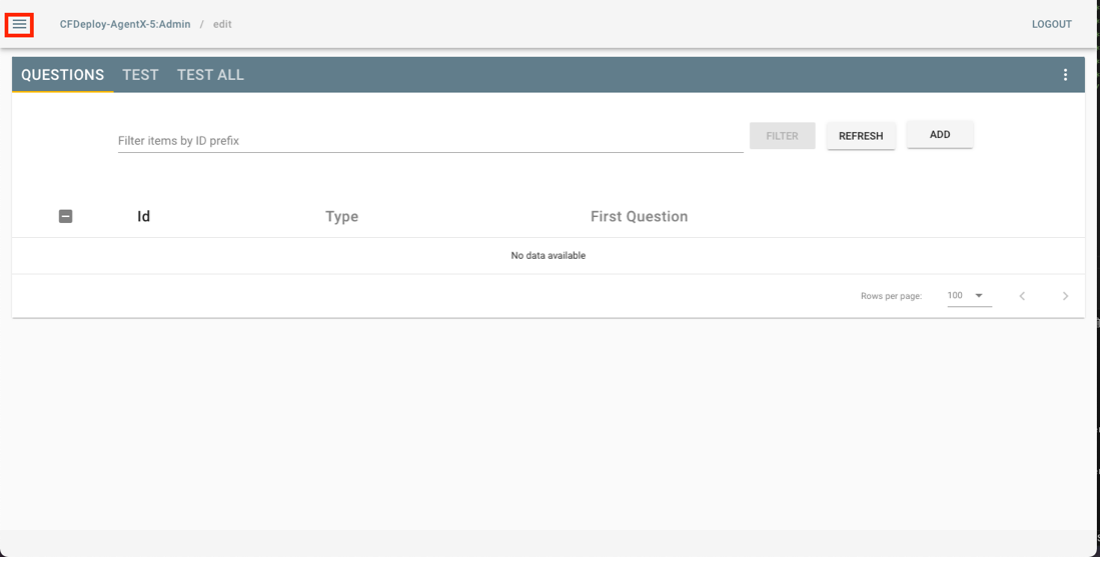
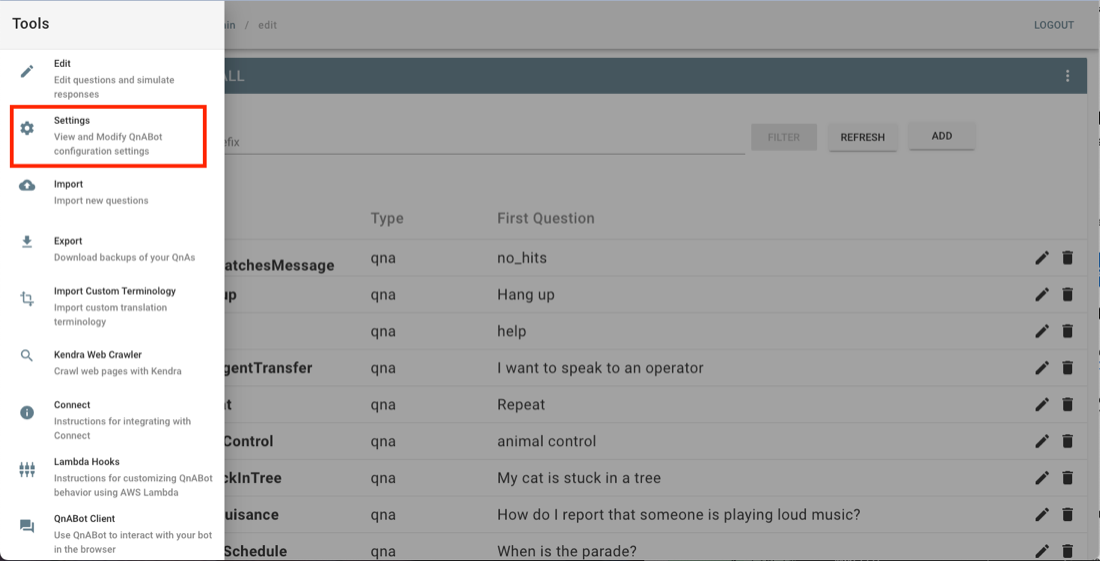
In the Content Designer, click on the hamburger menu in the upper left corner to view the Tools menu.
In the Tools menu, click on Import.
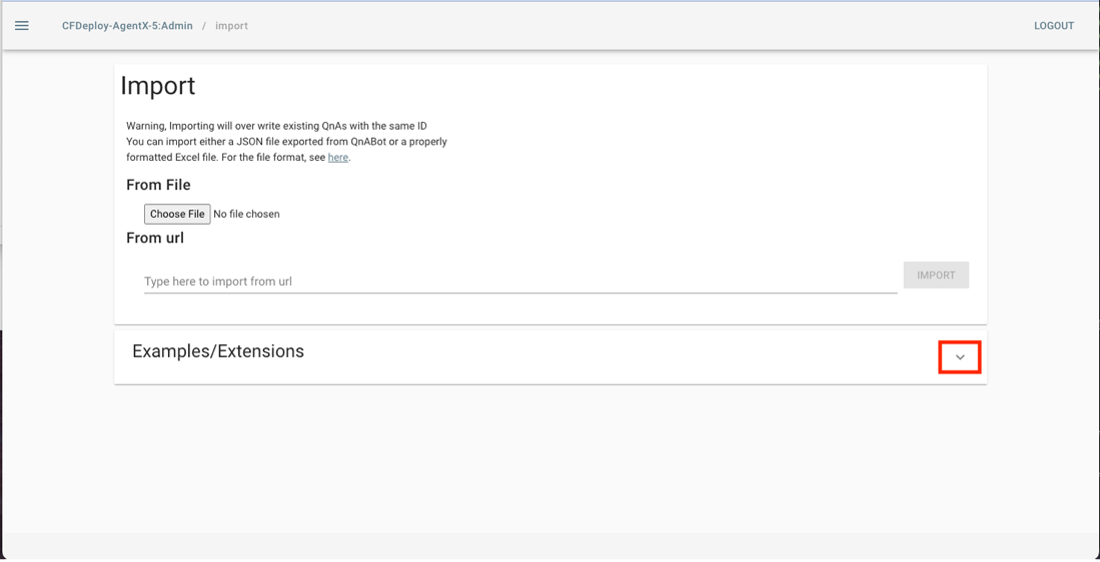
On the Import page you have two options. a. The first option is to import an extension from a file or URL. b. The second is to import a Skill Pack from the Examples/Extensions section. To see the available Examples/Extensions click on the arrow on the right.
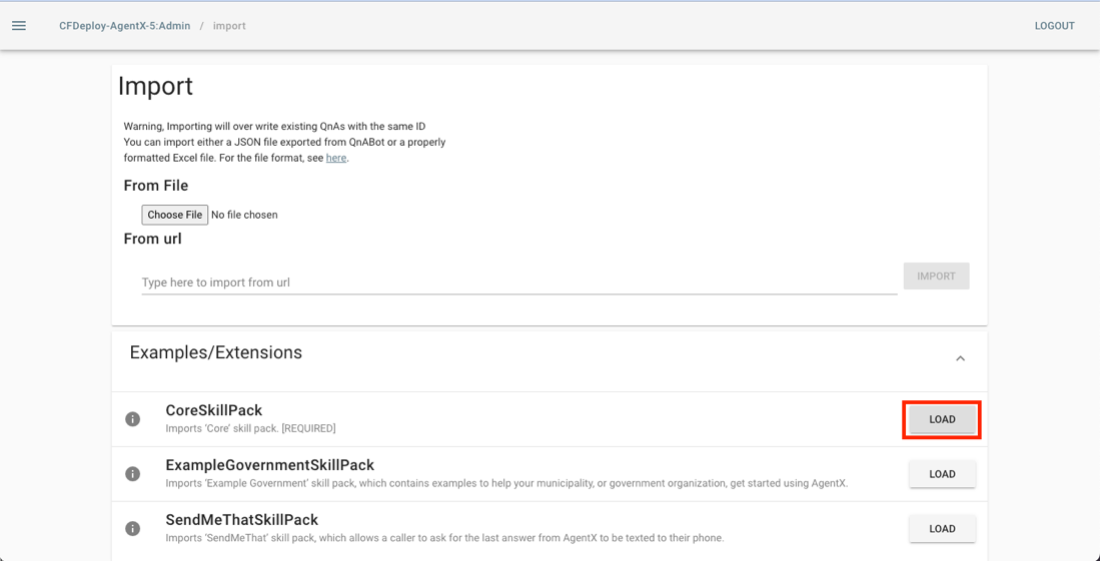
Now that we have a list of Skill Packs to choose from, we only need to click the LOAD button to import the Skill Pack. In this example I will import the CoreSkillPack.
You’ll see a progress bar as the Skill Pack is loaded. This is generally a formality since the Skill Packs generally load very quickly. Once the Skill Pack is loaded you’ll see a full progress bar and a status message that says Complete. You will also see a trash can icon to the right of the progress bar. Clicking the trash can icon simply deletes the record showing that the Skill Pack was imported. It does not remove the Skill Pack contents from AgentX.

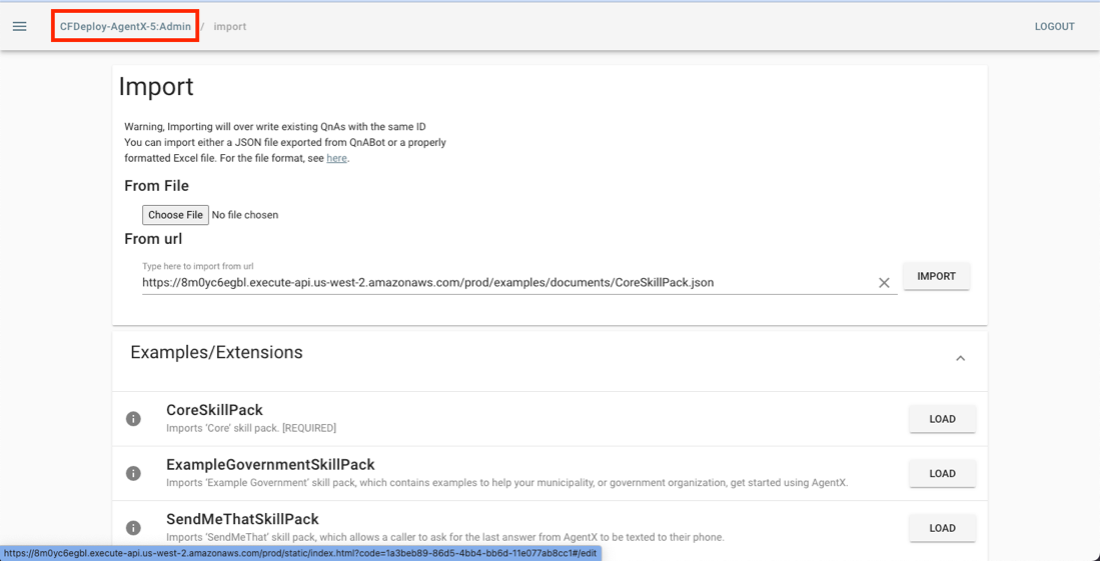
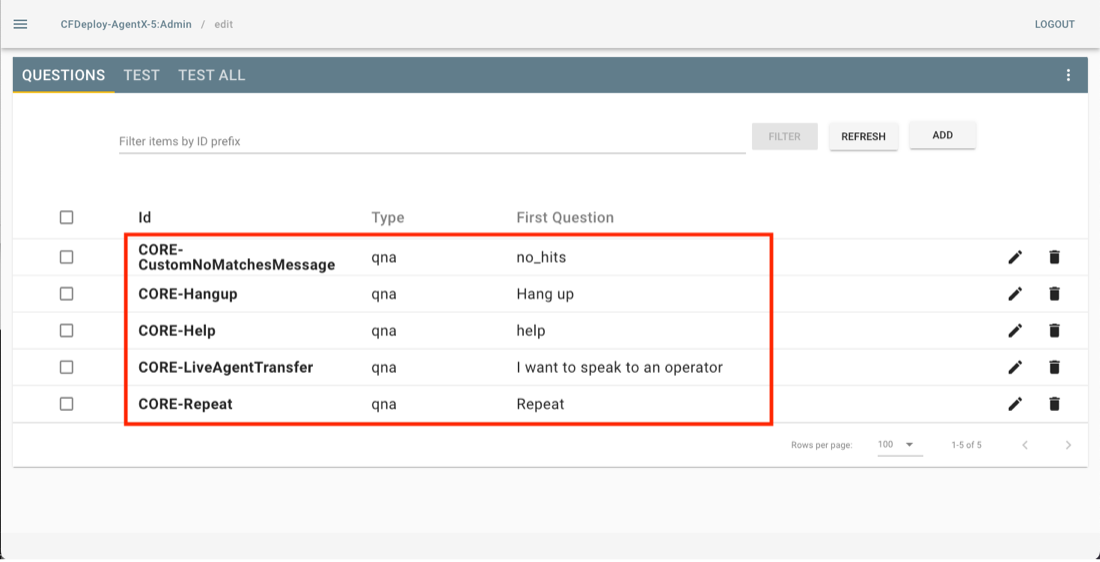
Now, if we click on the AgentX deployment name at the top of the screen, we will be taken back to the main page where we will see the new questions added by importing the Skill Pack.
That’s all it takes to add a Skill Pack. Just remember to check the documentation for any required configuration!
SendMeThat Skill Pack Response Prompt Configuration
This section is still a work in progress
The SendMeThat Skill Pack gives AgentX the ability to send a text message with the contents of the last response it gave to a caller.
For example, if a user calls in and asks, “Where is the nearest animal control center?”, then AgentX responds with the requested information. That’s great, but if the response is an address, as in this example, the caller might prefer to be able to ask to have that information sent to them as a text message. This is exactly what SendMeThat does.
In the Content Designer, click on the hamburger menu in the upper left corner to view the Tools menu.

Click on the Settings option.

Use the browser search function to search for the term “SMT_SUCCESS_RESPONSE” on the Settings page.
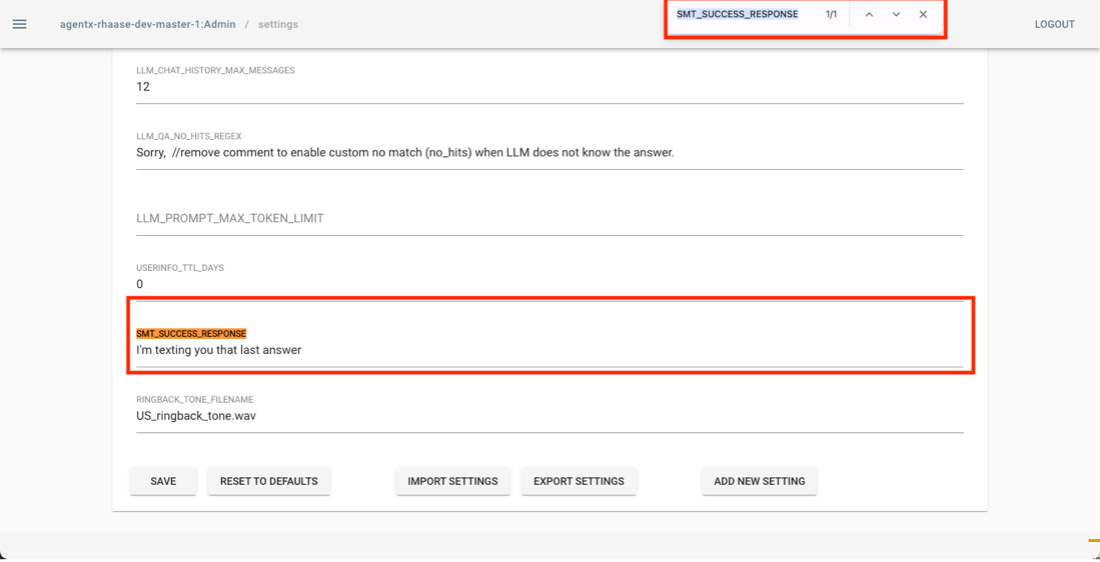
Here we see that the current response is “I’m sending you that last answer”. To change this simply update the text field, then click save at the bottom of the page.

Once you have clicked save the change will take effect immediately.
Custom Ringback Tone Configuration
In the Content Designer, click on the hamburger menu in the upper left corner to view the Tools menu.

Click on the Settings option.
Use the browser search function to search for the term “RINGBACK_TONE_FILENAME” on the Settings page.
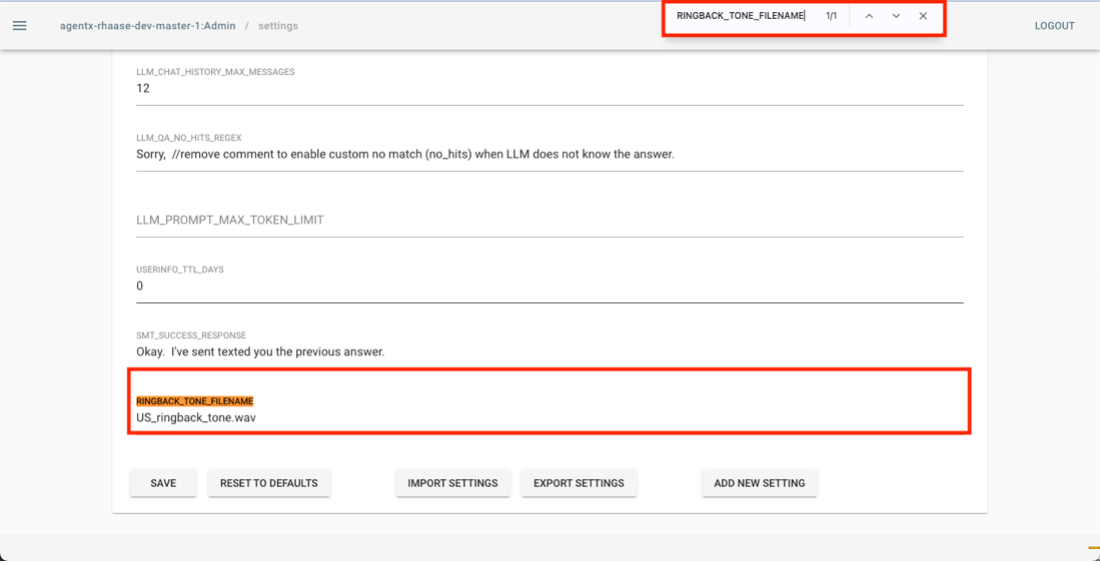
By default, the US_ringback_tone.wav is played when a caller is being transferred to another number. If you want to play a different audio file, or if you want to disable playing a ringback tone you will use this setting. a. To disable playing a ringback tone simply delete the filename from this variable and click Save at the bottom of the page. b. To change the ringback tone to a different audio file, change the name of the audio file to another audio file that has been added to appropriate location in the AgentX S3 asset bucket. See Adding Asset Content
Changes to this setting will take effect immediately.
Custom Prompts Configuration
This feature has not been fully documented yet.
Adding Asset Content
This feature has not been built. As of 2024-01-02 adding asset content like ringtones requires uploading a file to the AgentX asset bucket to the prefix ‘agentx/custom/’